It’s easy to take screenshots, but capturing them in high resolution so they look sharp and professional can be trickier. Whether you’re a designer creating mockups, a teacher preparing materials, or just someone wanting a clear snapshot of a webpage or chat, knowing the right method makes all the difference.
This guide shows you how to take high-resolution screenshots on Windows, Mac, Chrome, and mobile devices, ensuring your captures are crisp, detailed, and ready for any use.
What Affects Screenshot Resolution
Before learning how to take high-resolution screenshots, it’s important to understand what determines the clarity and quality of a screenshot, so that you can adjust settings or choose tools that maximize image quality.
🔍 Here are the main factors that impact screenshot resolution:
- Screen Resolution: The higher your display resolution (e.g., 1080p vs 4K), the sharper your screenshot will be.
- Screenshot Method: Built-in shortcuts may compress the image slightly, while advanced apps like Chill Recorder preserve full quality.
- Image Format: Saving screenshots as PNG retains more detail than JPG, which compresses and reduces clarity.
- Compression and Editing: Resizing, editing, or using software that compresses images can lower the resolution of your screenshots.
How to Take High-Resolution Screenshots on Windows 11/10
Windows provides several options, from quick keyboard shortcuts to a high-quality Snipping Tool, as well as third-party apps for even more precision. These methods will help you create sharp, professional-quality screenshots in different situations.
Method 1. Using PrintScreen to Take High-Quality Screenshots
Many users may prefer the PrintScreen method to capture a high-quality screenshot because it’s quick, universally available on nearly every Windows keyboard, and requires no extra setup or software. It’s a one-button solution that works instantly, whether you want to capture the entire screen or just a single window.
The real advantage comes from its flexibility, which means you can paste the screenshot into any program, like Paint, Word, or image editors, save it as a high-quality PNG, and preserve sharp details.
Let’s look at the key combinations you can use to take high-resolution screenshots:
- PrtScn: Captures the entire screen and copies it to the clipboard.
- Alt + PrtScn: Captures only the active window and copies it to the clipboard.
- Windows + PrtScn: Captures the entire screen and automatically saves it as a PNG file in Pictures > Screenshots.
- Fn + PrtScn (on some laptops): Same as pressing PrtScn, needed when the key is combined with function controls.
- Fn + Windows + PrtScn: On laptops, saves the full-screen capture directly to the Screenshots folder.
Method 2. Take High Quality Screenshots with Snipping Tool
The Snipping Tool is a versatile built-in utility on Windows 10 and 11 that makes it easy to take high-resolution screen captures without additional software. It offers rectangular, free-form, window, and full-screen snip modes to suit a variety of tasks. By saving screenshots in PNG format, it preserves maximum clarity.
However, the Snipping Tool has some limitations: it lacks advanced features like capturing scrolling pages or batch captures, which may be necessary for professional or more complex workflows. Despite this, it remains a quick and reliable choice for high-resolution screenshots in everyday use.
📝 Here is how to take high-quality screenshots on Windows 10 and 11 using the Snipping Tool:
Step 1. Press Windows + Shift + S to open the Snipping Tool.
Step 2. Select the type of snip: rectangular, freeform, window, or full-screen.
Step 3. Save the screenshot in PNG format for the best quality.
Tip: Make sure your display is set to the highest available resolution (Settings > Display > Resolution) before capturing.
Method 3. Take High-Resolution Screen Capture Using Chill Recorder
Chill Recorder makes taking high-quality screenshots on Windows both powerful and easy. After launching the app and selecting the Screenshot option, you can simply press the Space key to capture the entire screen, or drag your mouse to select a specific area.
For webpages or long documents, Chill Recorder even lets you scroll while capturing, producing a single, high-resolution image of the entire page. Every screenshot maintains crisp clarity and full resolution, making it perfect for presentations, tutorials, or other use cases, all without any complicated setup.
📝 This tutorial will guide you through the high quality screen capture step by step:
Step 1. Download and install Chill Recorder on your Windows PC.
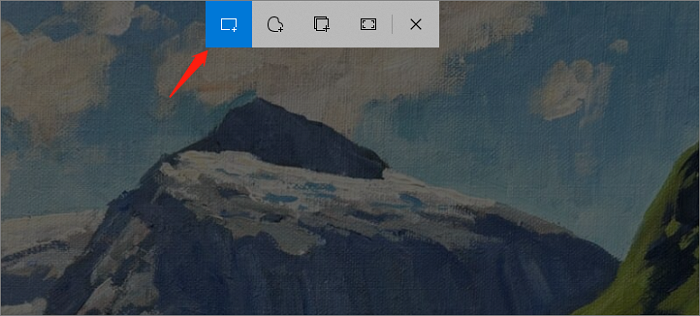
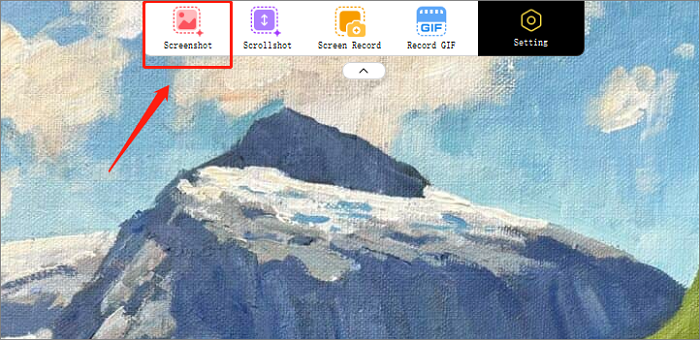
Step 2. Open the app and select Screenshot from the toolbar on the top of your screen.
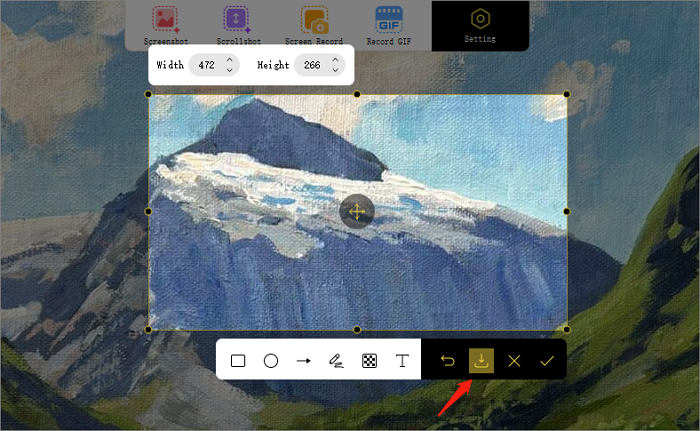
Step 3. Choose whether to capture the full screen (using the space key) or a selected area (by dragging your mouse).
Step 4. Click on the Download icon to save your screenshot to the chosen location. The default format is PNG, which helps maintain the image quality.
How to Take Hi-Res Screenshots on Mac
Switching to Mac, there are several ways to capture high-resolution screenshots efficiently. Whether you prefer using hotkeys for instant captures or leveraging the Preview app for more control and editing options, macOS makes it easy to get high-resolution images.
Method 1. Capture HQ Screenshot Using Hotkeys
On a Mac, using hotkeys is one of the easiest ways for high-resolution screen capture. Hotkeys integrate smoothly with macOS’s intuitive interface, allowing users to capture windows, selected areas, or full screens with minimal disruption.
This method is especially convenient for Mac-specific workflows, such as capturing content from the Finder, menu bar items, or app interfaces. Moreover, the screenshots you take will be saved in PNG format automatically, so you won’t need to worry about the clarity and the details of the screenshots.
📝 Use these simple hotkey combinations to grab high-quality screenshots on macOS:
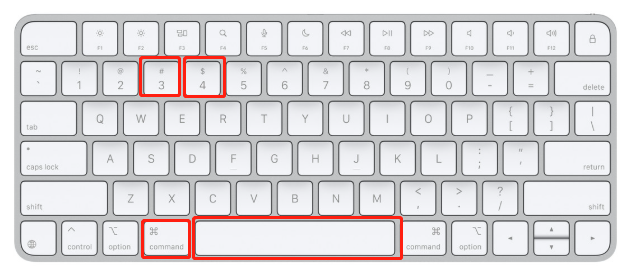
- Command + Shift + 3 → Capture the entire screen in full resolution.
- Command + Shift + 4 → Select and capture a specific area of the screen.
- Command + Shift + 4 + Spacebar → Capture a specific window with sharp details.
Method 2. Capture High-Quality Screenshots via the Preview App
Another convenient option for Mac users is the built-in Preview app, which offers more than just viewing images and PDFs.
Preview allows you to capture high-quality screenshots and immediately refine them within the same interface. You can crop, resize, adjust resolution, and even annotate your screenshots without needing third-party software. This makes it a great option for users who want to keep their workflow simple while still ensuring their captures stay high resolution.
📝 Follow these steps to take a high-quality screenshot using the built-in Preview app:
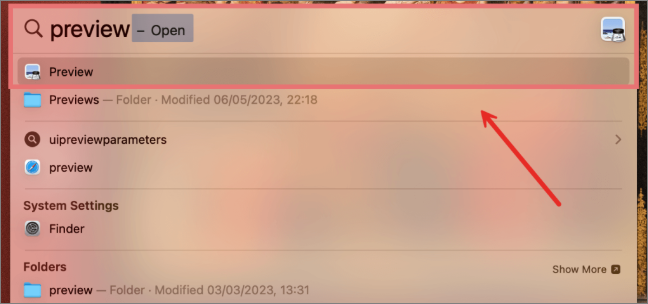
Step 1. Open the Preview app from your Applications folder or by searching in Spotlight.
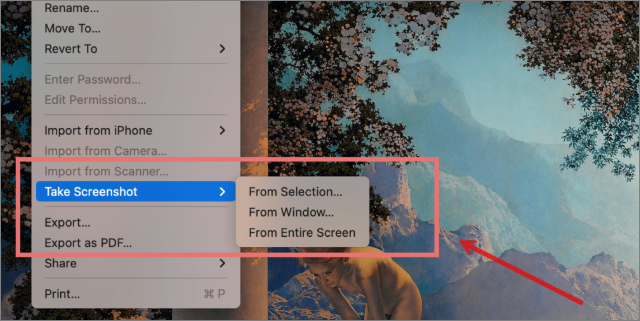
Step 2. In the top menu bar, click File > Take Screenshot. You’ll see three options:
- From Selection → capture only a chosen portion of the screen.
- From Window → capture a specific window with clear details.
- From the Entire Screen → capture everything on your display.
Step 3. Choose your preferred option. If you select From Selection, drag your cursor to outline the exact area you want.
Step 4. The screenshot will automatically open in Preview, where you can save it in high-resolution formats (like PNG or TIFF) or make quick edits.
How to Take a High-Res Screenshot on Mobile Phones
Taking a screen capture with high resolution on iPhones or Android phones is just as simple using their built-in tools. Let’s dive into the detailed operations on mobile devices.
Method 1. High Quality Screen Capture on Android
Most Android devices feature a built-in Screenshot tool that makes it easy to capture the entire screen or select specific areas with high resolution. Many modern Android phones also support scrolling screenshots, letting you capture full webpages or chat threads in a single image.
📝 The following tutorial will take the Samsung Galaxy phone as an example to show you the steps to capture high-resolution screenshots on Android:
Step 1. Navigate to the screen you want to capture.
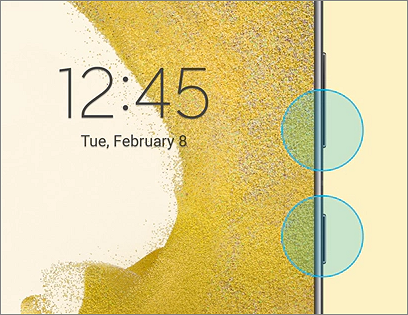
Step 2. Press Power + Volume Down simultaneously for a second. You’ll see a quick animation indicating the screenshot has been taken.
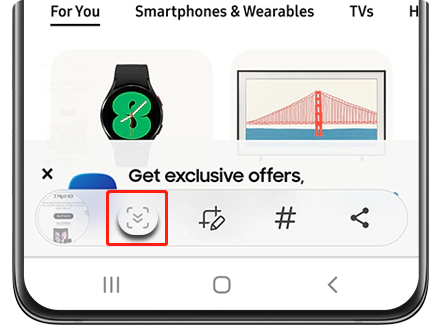
Step 3. To capture a longer page (like a webpage or chat), tap Scroll Capture (or “Capture More”) at the bottom of the screen. Scroll automatically while the phone extends the screenshot.
Step 4. Access your screenshot from the Gallery or Photos app, where you can view, crop, annotate, or share the image.
📌 Tip: Use the Edge Panel (if available) or Samsung’s Palm Swipe feature for an alternative way to capture screenshots with precision.
Method 2. Capture High-Resolution Screenshots on iPhone
iPhones with iOS 13 and later make it easy to take high-resolution screenshots. The core screenshot function is consistent across iOS 13, 14, 15, and newer versions, but later updates add enhanced editing, annotation, and full-page capture features in Safari.
With these built-in tools, iPhone users can quickly capture screens or entire webpages in high quality, keeping their visuals sharp and professional without needing additional apps.
📝 This is detailed guidance for screen capture with high resolution on iPhone:
Step 1. Navigate to the screen you want to capture.
Step 2. Take a screenshot:
- On iPhones with Face ID: Press Side Button + Volume Up simultaneously.
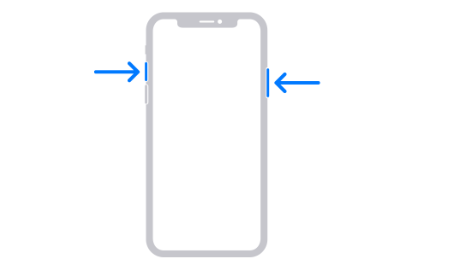
- On iPhones with a Home Button: Press Home Button + Side (or Top) Button simultaneously.

Step 3. Tap the floating thumbnail that appears in the bottom-left corner to open editing tools. Here you can crop, annotate, or highlight areas.
Step 4. To capture full webpages in Safari, select the Full Page tab at the top of the editor.
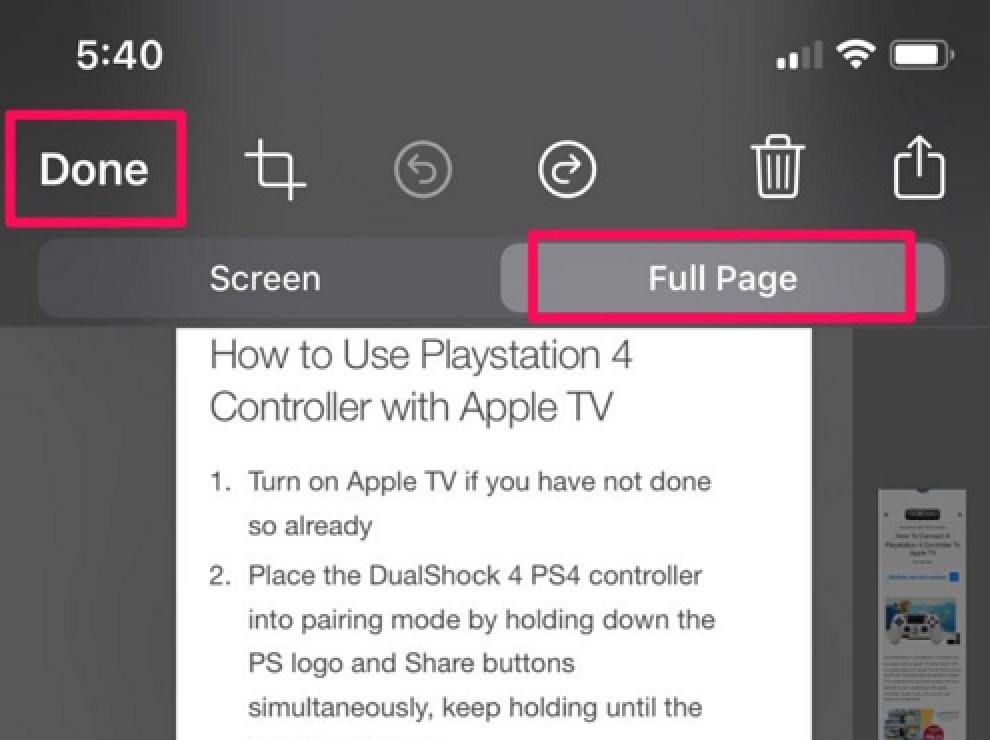
Image Credit from OSXDaily
Step 5. Tap Done and choose Save to Photos to store your high-resolution screenshot.
Conclusion
This post talked about how to take higher resolution screenshots across Windows, Mac, and mobile devices. By exploring built-in tools like Snipping Tool, Preview, native iPhone and Android screenshot features, you can capture images of high quality every time.
Understanding the strengths of each method helps you choose the right approach for your needs, whether it’s for content creation or sharing important information.
FAQs About High Quality Screen Capture
Still curious about how to get the best screen captures? Check out these frequently asked questions for quick tips and answers.
Why are Windows screenshots so low quality?
Windows screenshots can appear low quality because many built-in tools capture only the screen’s current resolution. Display scaling, monitor resolution, and capture methods (shortcuts vs. apps) also affect clarity. Some tools compress images when saving. For sharper, high-resolution screenshots, use tools like Snipping Tool, Snip & Sketch, or third-party apps that preserve full pixel detail.
How to take high-quality screenshots on Windows without Snipping Tool?
Even without the Snipping Tool, you can capture high-quality screenshots using several alternatives. Among all these options, using the hotkeys are the most convenient method:
Step 1. Make sure the content you want to capture is visible on your screen.
Step 2. Press Windows key + Shift + S. The screen will dim, and a small toolbar will appear.
Step 3. Choose a snip type:
- Rectangular Snip – capture a specific rectangular area.
- Freeform Snip – draw a custom shape around the area you want.
Step 4. Click and drag your mouse to select the area. Release to capture.
Step 5. The screenshot is automatically copied to the clipboard. Open Snip & Sketch (or another image editor) to annotate, crop, and save the image in high resolution.
How to take 4K screenshots on PC?
Capturing 4K screenshots on a PC typically requires a third-party tool, as built-in Windows options often cannot preserve ultra-high resolution. Tools such as Chill Recorder allow you to save images without losing clarity, making them ideal for professional-quality 4K captures.
Here is how to use it:
- Step 1. Install and launch Chill Recorder on your computer.
- Step 2. Click the “Screenshot” button to start capturing the screen.
- Step 3. Use the available tools to annotate your screenshot, or click the Download icon to save it to your chosen folder.
How to take high-resolution screenshots on Chrome?
When capturing screenshots of webpages, you might notice that the text can sometimes look blurry. Don’t worry. Google Chrome allows you to capture images using its built-in “Developer Tools” to maintain the clarity of the text.
The following guidance will teach you how to use the Developer Tools to capture high-quality screenshots on Chrome:
- Step 1. Open the webpage you want to capture in Chrome.
- Step 2. Open Developer Tools by pressing Ctrl + Shift + I on Windows or Alt + Command + I on a Mac.
- Step 3. Activate the device toolbar by clicking the device icon in the Developer Tools panel, or press Ctrl + Shift + M (Windows) / Command + Shift + M (Mac).
- Step 4. In the device toolbar, click the dropdown menu (usually set to “Responsive”), choose Edit, and add a custom device with your preferred screen resolution. Save the settings once configured.
- Step 5. Select your newly created device from the dropdown menu. When the page is displayed in this high-resolution simulation, click on the three dots at the top right side to take a high-resolution screenshot.