Taking screenshots is easy – but what if you only want to capture part of your screen instead of the whole thing? Many Windows users face this exact issue. Whether you’re trying to save a section of a webpage, highlight an error message, or grab part of a presentation, it’s important to know how to take a partial screenshot on Windows. The challenge is that the method can vary depending on which version of Windows you’re using – Windows 11, 10, 8, or even 7.
In this guide, we’ll walk you through the different built-in tools and shortcuts, as well as a few helpful third-party options, so you can quickly capture just the area you need.
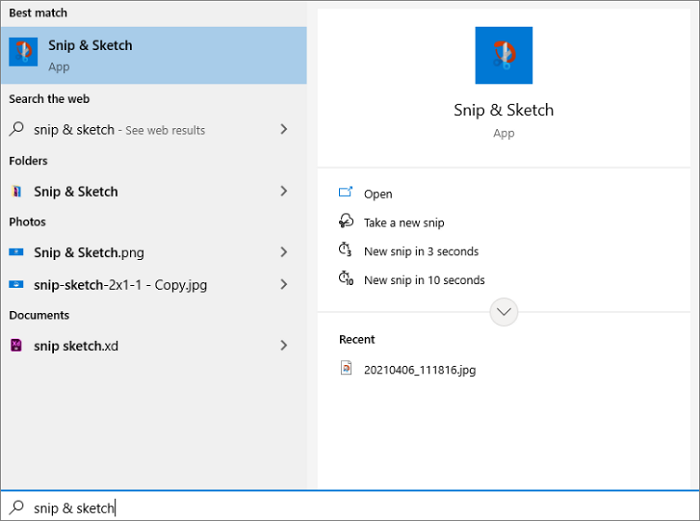
How to Partial Screen Capture Windows 11/10 via Snip & Sketch
If you are using a Windows 10 or 11 computer, Snip & Sketch makes it easy to perform a partial screen capture. Instead of capturing the entire display, this tool lets you screenshot a portion of the screen, giving you precise control over what content you save.
In addition, Snip & Sketch provides convenient editing options, such as cropping, annotating, and basic markups, so you can refine your captures before saving or sharing. Whether you’re creating tutorials, saving important information, or grabbing sections of a webpage, this tool makes capturing only what you need fast and efficient.
Here is the tutorial for Windows partial screenshot using Snip & Sketch:
Step 1. Launch Snip & Sketch from the start menu.
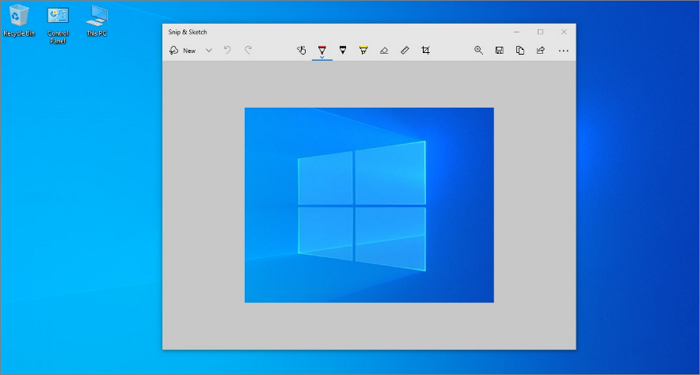
Step 2. Click one of the options on the toolbar: Rectangular Snip for a rectangular area or Freeform Snip to draw a custom shape.
Step 3. Click and drag your mouse over the section of the screen you want to capture. Release the mouse button to take the screenshot.
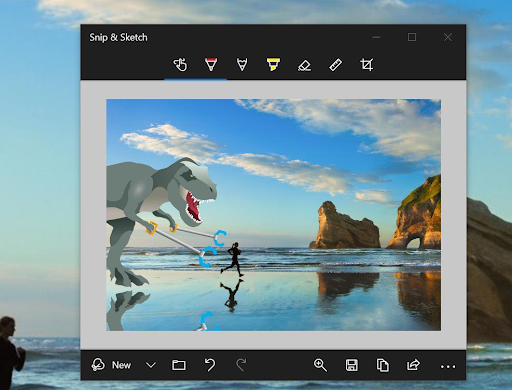
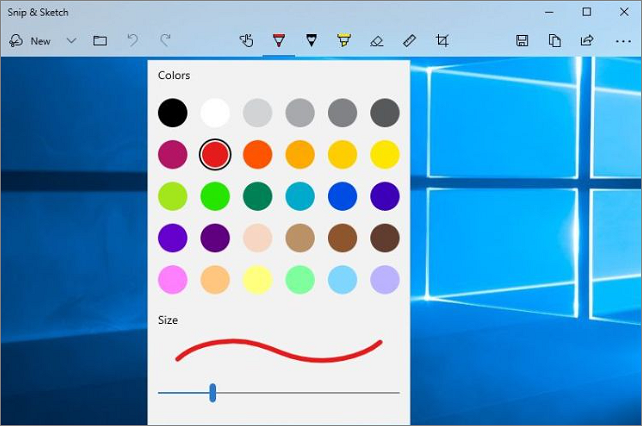
Step 4. Click the notification that appears in the bottom-right corner to open the Snip & Sketch editor. Use the pen, highlighter, or crop tools as needed, then click Save (floppy disk icon) to store your capture.
How to Partially Screenshot on Windows 10/8/7 Using Snipping Tool
When you need a partial screenshot on Windows, the Snipping Tool is one of the simplest solutions available in Windows 7, 8, and 10. Instead of capturing the entire screen, it lets you select only the exact area you want to save or share. This makes the tool ideal for grabbing a cropped section of a webpage, a specific window, or any detail without clutter.
With flexible snip styles, you can take a partial screenshot of Windows in rectangular or free-form shapes, depending on your needs. Once captured, the Snipping Tool also allows basic annotations and easy saving, making it a practical option for quick edits and everyday use.
The following tutorial will guide you through how to partially screenshot on Windows using Snipping Tool:
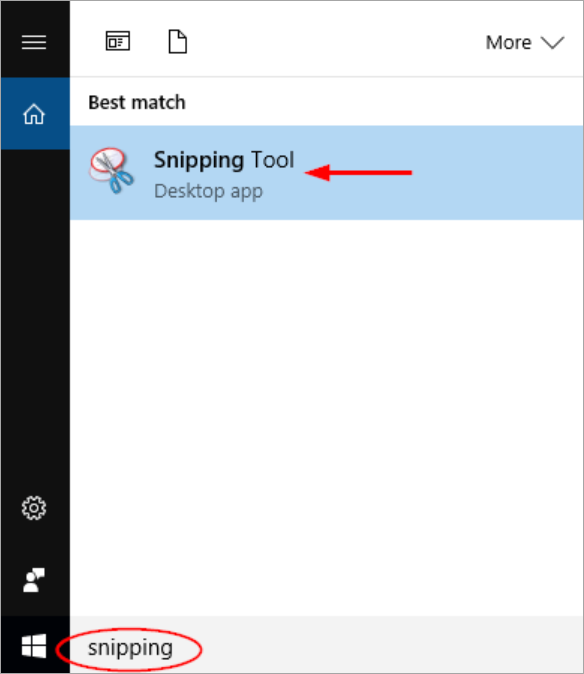
Step 1. Click the Start menu (the Windows icon), type “Snipping Tool” in the search bar, and select it from the results to launch the app.
Step 2. In the Snipping Tool window, click the Mode (or arrow next to “New” in some versions). Select Rectangular Snip to capture a chosen area of your screen.
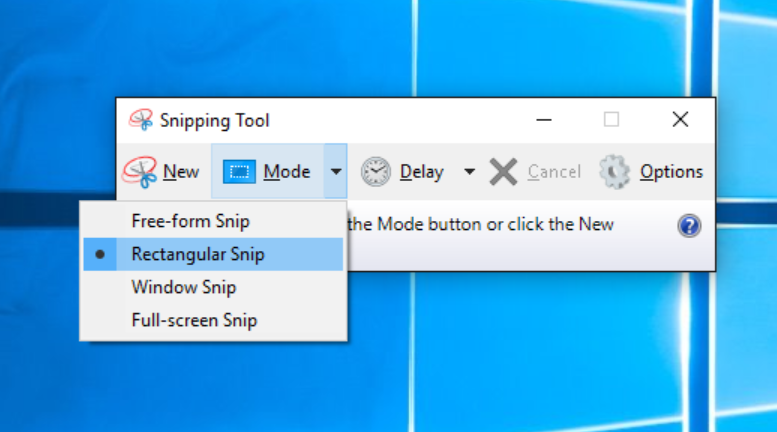
Step 3. Click New, then drag your mouse pointer to draw a rectangle around the exact area you want for the partial screenshot in Windows. Release the mouse to finish.
Step 4. Your capture will open in the Snipping Tool preview window. From here, click File > Save As to save it, or use the pen and highlighter tools to make quick annotations before saving.
How to Take Partial Screenshot on Windows 11/10 with Hotkeys
For users who need speed and efficiency, the keyboard shortcut method is ideal for screen capturing a part of the screen instantly. Unlike Snipping Tool or Snip & Sketch, which require opening an app and selecting a snip type, this method works immediately – perfect for quickly grabbing error messages, chat conversations, or specific content from a webpage without interrupting your workflow.
This approach is especially useful for people who capture multiple small sections throughout the day, as it saves time compared to launching a tool each time.
Here is how to capture part of the screen on Windows using the keyboard shortcut:
Step 1. Make sure the content you want to capture is visible on your screen.
Step 2. Press Windows key + Shift + S. Your screen will dim, and a small toolbar will appear at the top, ready for capturing.
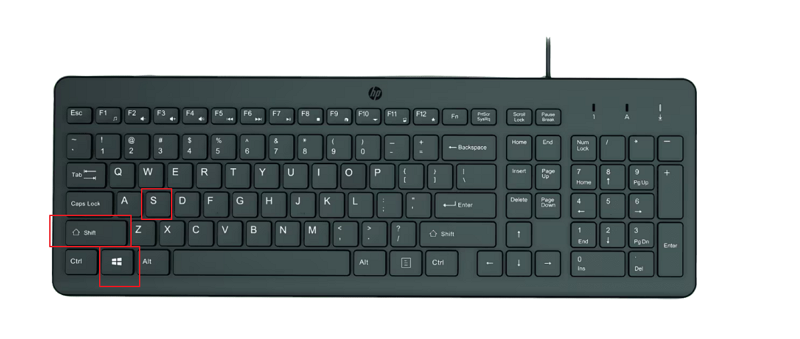
Image Credit from hp.com
Step 3. Choose the Rectangular Snip (default) or Freeform Snip, then click and drag your mouse to select the exact area you want. Release the mouse button to take the screenshot.
Step 4. The screenshot is automatically copied to your clipboard. Click the preview notification that appears to open it in the Snip & Sketch editor, where you can annotate, crop, or save the selective screenshot to your preferred location.
How to Capture Windows Screen Selectively or Fully Using a Third-Party Tool
For users who want more control over their captures, using a powerful third-party tool like Chill Recorder is an excellent way to screenshot a specific or full area of Windows efficiently. Chill Recorder is built for users who need both precision and flexibility in their screenshots.
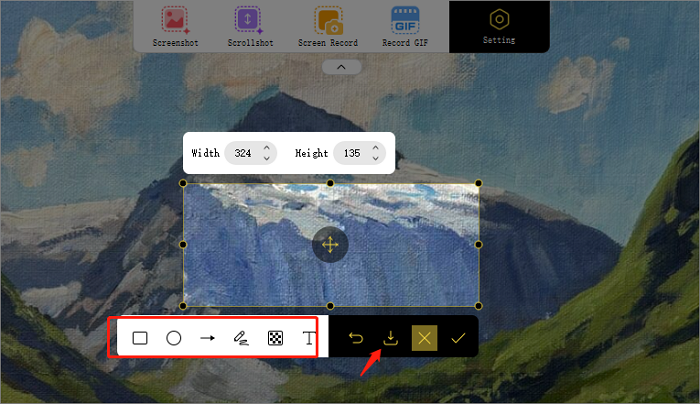
In addition to the basic screenshotting function that allows freehand selection by dragging the mouse, it lets you enter exact dimensions in pixels, ensuring the captured image is perfectly sized. And this feature makes it an ideal choice for those who require pixel-perfect visuals. Its built-in annotation tools are also useful when you need to add an arrow for emphasis, insert text or notes, or even apply mosaic to hide sensitive information.
All its benefits make it an excellent choice for anyone who needs to capture partial screenshots with accuracy and ease.
How to screenshot a section on Windows using Chill Recorder:
Step 1. Visit Chill Recorder and download the application. Launch it once installed.
Step 2. Select the Screenshot option from the top toolbar. Now, you can drag your mouse to focus on a specific area you need to capture, or just set the width and height of the screenshot.
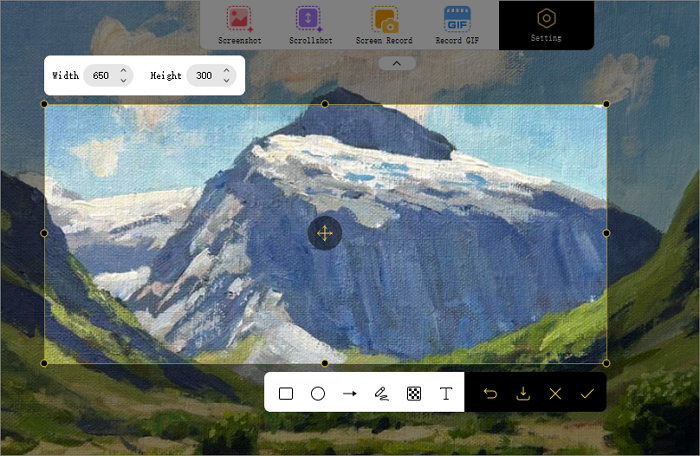
Step 3. Choose the tools to annotate your screenshot if necessary. After that, click on the “Download” icon to save the screenshot to your PC.
Common Issues and Troubleshooting Tips
Even with the best tools, issues can happen. Let’s go over some common problems you might encounter and how to fix them when taking partial screenshots on Windows.
1. Why Is the Snipping Tool or Snip & Sketch Not Working?
If your Snipping Tool or Snip & Sketch isn’t working, it’s usually due to software glitches, outdated Windows updates, or conflicts with other apps. First, make sure your Windows version is up to date, as these tools rely on system updates to function correctly. You can also try restarting your computer or closing any background apps that might interfere with screen capturing.
2. Why Your Screenshot Quality Might Be Low
Low-quality screenshots usually happen because of display settings, scaling issues, or the method used to capture the screen. For example, capturing a full-screen image on a high-resolution monitor and then resizing it can make it appear blurry or pixelated. Some built-in tools, like Snipping Tool or keyboard shortcuts, may also compress the image slightly when saving.
To improve quality, make sure your display resolution is set correctly, avoid resizing screenshots unnecessarily, and consider using tools like Chill Recorder, which allow you to take partial screen captures in high resolution without losing clarity.
Conclusion
This post talked about how to take a partial screenshot on Windows in several ways so that you can capture exactly what you need. Windows’ built-in tools like Snipping Tool, Snip & Sketch, and keyboard shortcuts are quick and convenient, while third-party apps like Chill Recorder offer pixel-perfect precision, custom dimensions, and built-in annotation tools.
For professionals, educators, or anyone needing high-quality partial screenshots, Chill Recorder stands out as the ideal choice for ensuring your captures are accurate, clear, and ready to use without extra editing.