Whether you’re creating a tutorial with step-by-step images, highlighting part of a presentation, or sharing a gaming moment, you may need to learn how to take a screenshot that best fits your needs. Many Dell users, however, aren’t sure which method works best for their situation. Should you capture the whole screen, just one window, or use a tool with editing features?
In this post, we’ll walk you through all the practical ways to screen capture on Dell laptops or desktop computers. From quick keyboard shortcuts to advanced tools for editing and sharing, you’ll find the method that fits your needs best.
How to Screenshot Dell Laptops/Desktop PCs Using Print Screen Key
For those who want to find the easiest way to screen capture on Dell laptops or PCs, using the print screen key is an ideal choice.
Capture Only the Active Window
Sometimes you may only need to share what’s happening in one program, not the entire screen. For example, you might want to take a screenshot of an error message to send to tech support, capture a PowerPoint slide for class notes, or share just a browser window during a meeting. The following steps will help make your screenshot clearer and more professional.
Here’s how to screenshot on a Dell with only the active window:
Step 1. Press Alt + PrtScr on your keyboard.
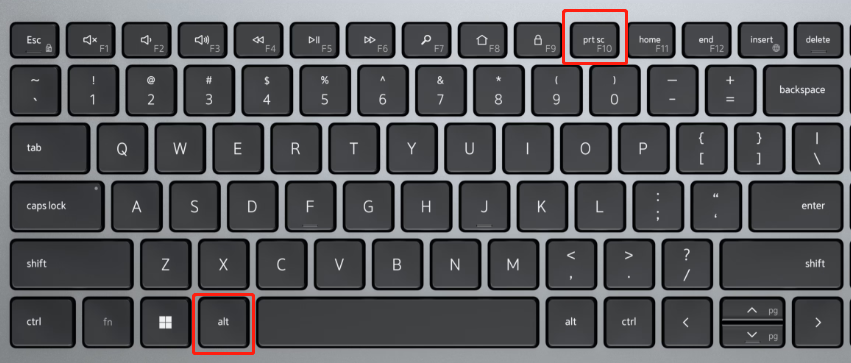
Image credit from www.dell.com
Step 2. The current active window is copied to your clipboard.
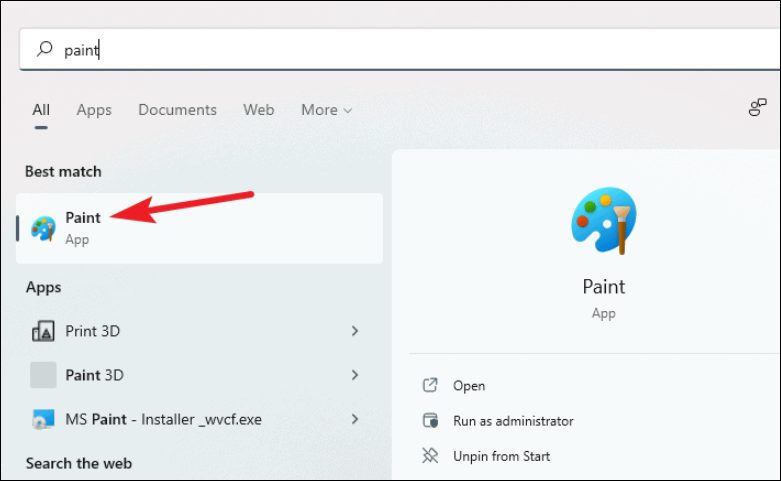
Step 3. Open Paint, Word, or any image editor and press Ctrl + V to paste the screenshot.
Step 4. Save the file in your preferred format.
Capture the Whole Screen
When capturing a full-screen game for recording and sharing on a Dell computer, there’s a key that can help you take the screenshots you need. It’s also ideal for keeping all the details on your screen when creating a tutorial to show others the steps.
How to take a screenshot on Dell computers with full screen:
Step 1. Press the PrtScr key.
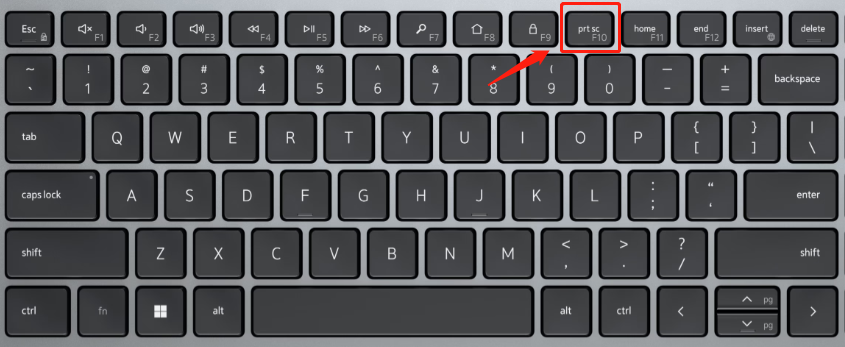
Image credit from www.dell.com
Step 2. The entire screen is copied to your clipboard.
Step 3. Paste into Paint, Photoshop, or any editing tool, then save.
Save Directly to File
Unlike the two ways mentioned above, this method automatically saves the screenshot as a file on your Dell computer. So you don’t need to open an editor like Paint or Word to paste and save the image manually. This approach is especially convenient when you take multiple screenshots in a row.
How to screenshot Dell laptops/PC and save automatically:
Step 1. Press Windows + PrtScr.
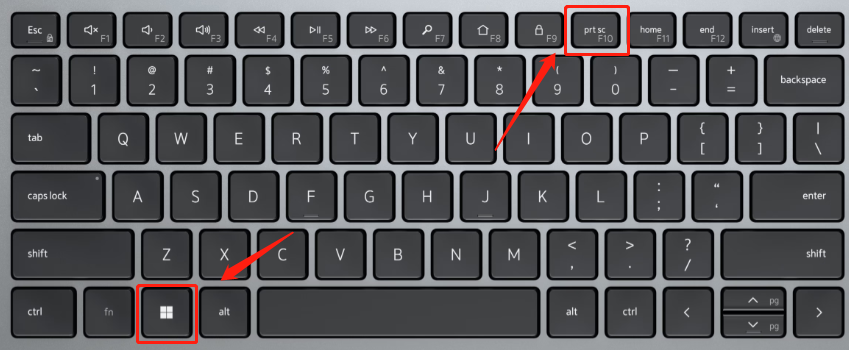
Image credit from www.dell.com
Step 2. The screen dims briefly to confirm the capture.
Step 3. Your screenshot is automatically saved in the Pictures > Screenshots folder.
💡 Tip: On some Dell keyboards, you may need to press Fn + PrtScn if the key shares functions.
How to Screenshot on Dell Laptops/Computers with Built-in Tools
Windows provides two handy screenshot apps – Snip & Sketch and the newer Snipping Tool – that give you more control over your captures.
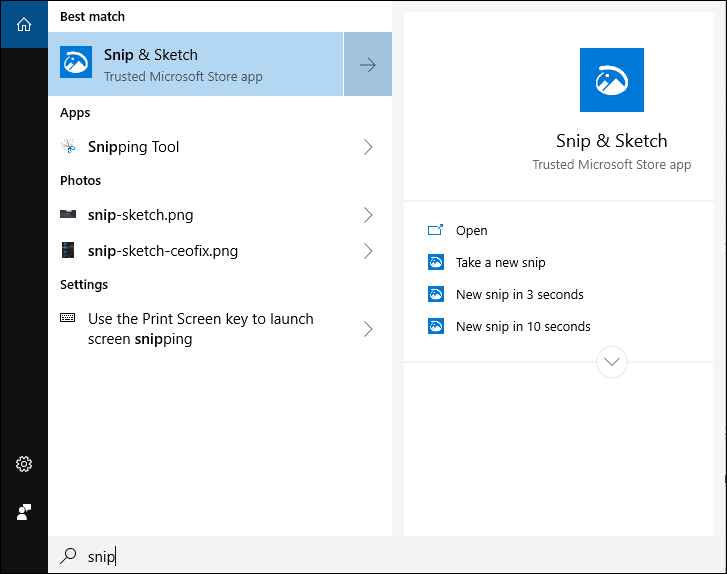
Screenshot on a Dell Using Snip & Sketch [Windows 10/11]
Snip & Sketch is a versatile built-in tool in Windows 10 and 11 that gives you more control over your screenshots compared to keyboard shortcuts. To be more specific, this tool allows you to select exactly which part of your screen you want to capture. So you can use it to highlight certain content in documents or presentations, or share a precise portion of your desktop.
Besides that, it also offers some built-in annotation options, which let you mark up screenshots with arrows, text, or highlights before saving or sharing.
How to take a screen grab on a Dell PC using Snip & Sketch:
Step 1. Press Windows + Shift + S or launch this tool from the Start menu.
Step 2. Choose between rectangular, freeform, window, or full-screen capture.
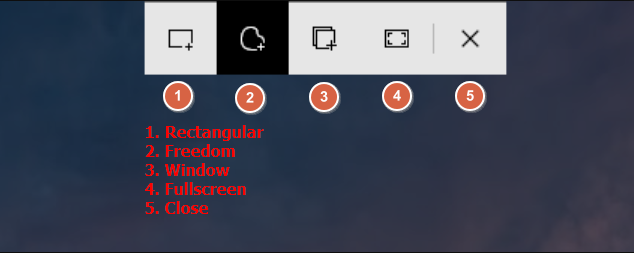
Step 3. The screenshot is copied to your clipboard, and a notification lets you edit and save it.
Screenshot on Dell Computers with Snipping Tool [Newer Windows 11]
For users who are using a newer Windows 11 operating system, there is another built-in application, which is named “Snipping Tool”, that gives you precise control over your screenshots.
This tool allows you to choose between multiple capture modes, including rectangular, freeform, window, or full-screen, and even set a short delay to capture menus or hover states. Once the screenshot is taken, it opens directly in the Snipping Tool editor, where you can annotate, crop, or save the image immediately.
How to take a screenshot on Dell PCs with the Snipping Tool:
Step 1. Open the Snipping Tool from the Start menu or press Win + Shift + S to launch this tool.

Step 2. Choose your snip mode: rectangular, freeform, window, or full screen.
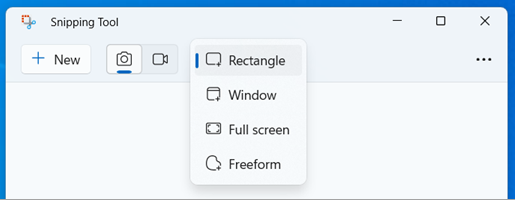
Step 3. You can set a delay to capture drop-down menus or hover actions.
Step 4. When it turns to the editor, you can annotate, crop, and save your screenshots.
How to Screenshot Dell Laptops/PCs Using Xbox Game Bar
The Xbox Game Bar is a powerful tool built into Windows 10 and 11, primarily designed for gamers, but it works for any Dell laptop or desktop. One of the advantages of Game Bar is that it lets you capture screenshots and record videos of your screen without leaving your current app or game.
However, the Game Bar has some limitations. It may not work well with smaller windows or non-gaming apps that don’t support overlay features. It’s especially beneficial for users who need to save full-screen gameplay.
How to screenshot from Dell laptops and desktop computers using the Game Bar:
Step 1. Press Windows + G to open the Game Bar.
Step 2. Click the Capture icon (camera) or press Windows + Alt + PrtScn.
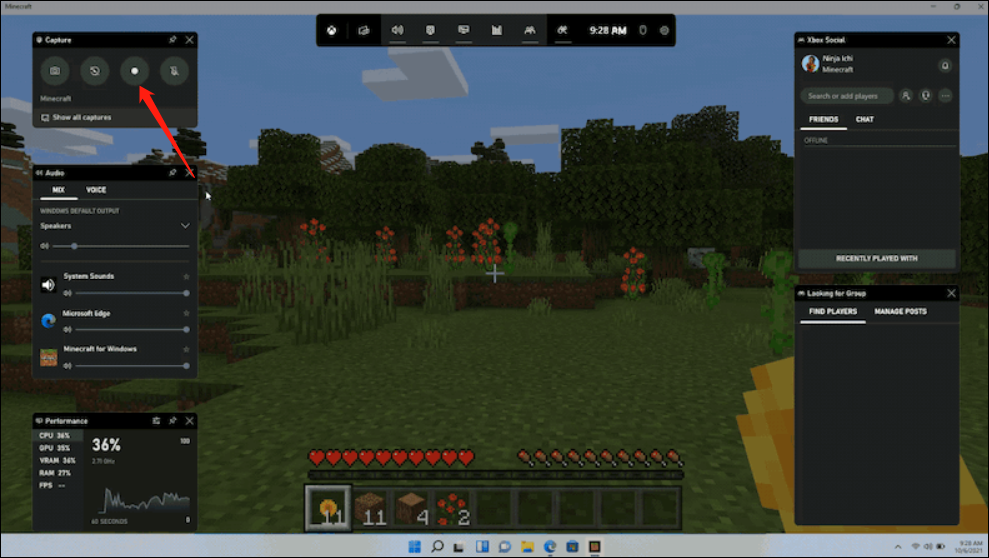
Image credit from Xbox Support
Step 3. Screenshots are automatically saved to Videos > Captures.
Step 4. Great for recording both images and gameplay clips.
How to Screenshot on a Dell Computer with a Third-Party Tool
If you want more advanced functions than Windows’ built-in options, Chill Recorder is a powerful all-in-one screenshot and screen recording tool. The all-in-one capture studio lets you capture the screen in various formats, such as PNG, MP4, as well as GIF. With a hassle-free interface, you can use it to record whatever you want without any professional skills required.
Chill Recorder is ideal for a variety of real-world scenarios. You can capture meetings or record your webcam, so you never have to worry about leaving out anything important. An editor is available when you need to take some notes, which enables you to insert text or arrows on the screenshot without starting any other annotating software.
Besides these powerful features, it even offers screenshots without a watermark and requires no sign-up. You can capture and edit in one streamlined workflow. That is why it works perfectly for tutorials, presentations, or content creation.
How to screenshot on Dell desktop computers and laptops with a robust third-party tool:
Step 1. Open Chill Recorder
Launch the app and choose whether to capture full screen, a custom area, or enable webcam.

Step 2. Capture and Annotate
Click on the “Screenshot” button in the toolbar. Then, move your mouse to freely select the area you want to capture. Below the capture area, there is a list of annotation tools you can use to edit the screenshot.
When you need to take a screenshot of a very long image, such as an entire webpage from top to bottom, the “Scrollshot” option in the toolbar will help.
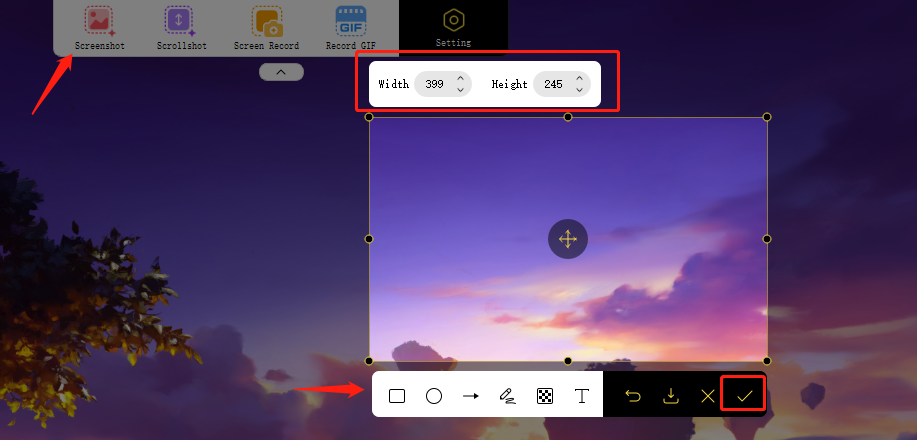
Step 3. Find the Screenshots
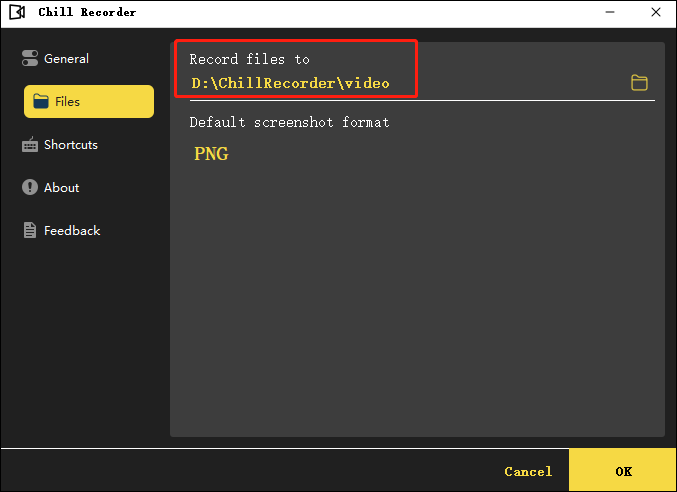
After clicking on the “Check” mark, the screenshot you took will be saved to your Dell computer. You can go to the main interface of Chill Recorder and find the path to the folder in the “Files” tab.
Conclusion
This post offered multiple solutions to the question: how to screenshot on Dell desktop computers in the most suitable ways. Whether you prefer quick keyboard shortcuts, built-in tools like Snip & Sketch or Snipping Tool, the Xbox Game Bar for full-screen captures, or a powerful third-party tool like Chill Recorder, there’s a method to fit every need.
After knowing the different options and their benefits, you can choose the most efficient way to capture, annotate, and share screenshots for work, gaming, tutorials, or presentations.
FAQs About Taking a Screenshot on a Dell
Now that you’ve learned all the main methods for capturing your screen, let’s answer some common questions users often have about taking screenshots on a Dell desktop or laptop.
1. How do you screenshot on a Dell desktop computer on Windows 10
Many Dell users need to capture their screen for work, school, or troubleshooting—whether it’s saving an error message, sharing a report, or documenting a tutorial. On Windows 10, the simplest method is to use the Print Screen key, and here is how to do that:
- Press Windows + PrtScn.
- The screen will dim briefly to indicate that the screenshot has been taken.
- Find your screenshot in Pictures > Screenshots.
2. How do I screenshot on Dell laptops with Command Prompt?
The short answer to this question is: Windows does not natively support screenshots through Command Prompt. While you can run scripts or third-party programs via Command Prompt, there’s no built-in command that captures your screen.
For practical purposes, it’s better to rely on Windows’ built-in methods, such as:
- Print Screen (PrtScn) to copy the entire screen or active window.
- Windows + Shift + S to use Snip & Sketch for selecting areas.
- Snipping Tool for delayed or annotated captures.
3. How do you take a screenshot on a Dell computer without the Print Screen button?
When it’s unable to screenshot on a Dell computer using the Print Screen button, Chill Recorder provides an easy solution. You can capture the entire screen, a specific window, or a custom area, and even annotate, edit, and save the screenshot immediately—no keyboard limitations required. Steps to Capture Screenshots with Chill Recorder:
- Launch the app from your desktop.
- Choose full screen, a specific window, or a custom area.
- Add text, arrows, or highlights in real-time.
- Export the screenshot directly to your folder or share instantly.